Self-build Project Planner
I know this is probably the most boring but hopefully informative blog entry you may come across. This entry is aimed at a newly built home for those of you who wishes to manage the project themselves. But, however you’re getting it built, this will show you the process and phases of how a house is constructed.
This will be the phases followed after the planning and drawing submissions to your local council.
A Self-builder’s Checklist — before and after you start:
– Obtain quotations from service suppliers, pay them and book them
– Organise warranties and arrange site insurance
– Inform all prospective tradespeople of your schedule
– Check lead-in times for main orders and make sure you have paid deposits
– Identify plant providers and tipping facilities
– Advise building control and warranty inspectors of commencement
– Ensure basic services are onsite, such as electricity and water
– Ensure that planning permission has been obtained prior to commencement of works
– Send off for quotations for services and utilities as soon as possible
– When you get the quotations, accept them and agree a timescale for their work
– Create accounts with local builders’ merchants and ready-mixed concrete suppliers
– Check lead-in times for materials and add them to your project planning
– Be aware that reinforcement may be required in the foundations. Mesh and
bar are easily obtainable but made-up cages will have a lead-in time
– Arrange the scaffolders in good time
– Start to choose second fix items and kitchens etc. Well in advance
NOTE: All projects vary to some degree and there is no set formula to determine that everything goes as planned and scheduled. This project is based on a house comprising: Strip foundations; Brick and block construction with insulated cavities;
Ground and intermediate floors suspended concrete; Trussed roof, tiled
1 PREPARE SITE
– Ground workers create site access
– Clear site and strip top soil; stacking material to be retained out of the way
– Set up site office and equip with drawings (at least two sets of drawings per contractor) and safety equipment
– Set up toilet, I’ll recommend getting a contract with a portable toilet company offering regular cleaning and emptying
– Fence site, if required
– Secure lock-up for larger equipment, hire a container to be positioned
(carefully consider where you wish for this to be positioned to avoid having to move it until the building work is completed)
– Arrange Water supply on boundary, if required
– Plumber to connect water standpipe
– Surveyor marks out building on cleared site and transfers the lines to profiles well clear of any construction work
– Bring in bricks and blocks and again stack clear of future construction
– Set up mixer station close to cement store and sand heap
2 FOUNDATIONS
– Ground workers excavate foundations
– Wait for approval of building control and warranty inspectors
– Position any reinforcement bars, mesh or cages in the trenches- if required
– Position any compressible material or slip membranes required within the trenches
– Lay ducts for services to enter through the foundations
– Arrange foot scaffold if necessary and shutter for any steps in the foundations
– Pour concrete footings and tamp to level
– Bricklayers build up foundation blockwork
– Fill cavities with concrete to level with external ground level
– Bed and lay damp-proof courses
3 START SUPER-STRUCTURE
– Ground workers to dig service trenches and lay pipes and
ducts to proposed positions
– Load out concrete floor beams to each bay and position
– Install drainage and pipes, proud of the oversite
– Infill floor beams with blocks
– Lay coursing blocks and position any grilles if required
– Brush grout
– Commence building superstructure
– Install templates for future windows and doors, etc.(you can plan these off the window and door schedule usually provided by the architect)
– First lift of scaffolding required
4 SUPERSTRUCTURE
– Bricklayers continue superstructure brickwork and blockwork including work on any chimneys
– Install and bed lintels including fireplace/ build in braai lintels
– Build in boxes for gas (if relevant or available) and electricity
– Electrician to install temporary unit within electricity box
– Service suppliers to carry out their work to the boundary
– Plumber to reroute water supply to position
– Electricity providers to install meter and connect (if there isn’t an existing meter already)
– Second scaffolding lift required
– Arrange crane to lift first floor beams onto each bay and position
– Position plasterboard battens
– Lay infill blocks
– Brush grout screed
– Continue building superstructure to wallplate level
– Third and then fourth lift of scaffolding required
– Carpenters to build end trusses
– Continue building up gable ends and chimney
– Additional lifts of scaffolding possibly required at the gable ends if relevant to the architectural design
– Plumber to fit flashings, trays and skirts
– Plumber to install pipes and flashing skirts as they come through the roof
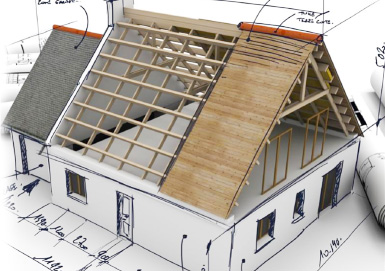
5 CONSTRUCT ROOF
– Carpenters to sling roof trusses, and trusses to be fixed down to wallplate
– All binders and bracing to be fixed at node points
– Layboards to be fixed to valleys, if relevant to architectural design
– Dormers to be constructed at this point
– Fascia and soffit to be fixed together
– Any roof must be installed at this point
6 ROOF COVERING
– Roofers begin to cut and lay under-cloaking to the verges
– Roofers to felt and batten
– Roof tiles to be laid
– Ridge/hip tiles to be laid and bedded
– Valley tiles to be laid
– Plumber to dress down flashings and skirtings
– Paint/stain facias, soffits and barges
7 EXTERIOR & INTERIOR FITTINGS
– Plumbers to fix guttering
– Window suppliers to fit external joinery
– Plasterers to carry out any external rendering
– Scaffolding to come down
– Plumbers to fit down-pipes and connect to drainage gullies
– Carpenters to commence first fix by fitting door linings, building any studwork partitioning and fixing window boards
8 FIRST FIX
– Flooring membrane and insulation, taping all joints and sealing up to the damp-proof course
– Underfloor heating, if applicable
– All first fix plumbing for hot and cold and waste within floor zones to be laid
– Internal gas pipework installed, if relevant and available
– Pipework to be brought to manifolds and outlet positions
– Supply and fix company to pump in and lay level floor screed, leave for three days
– Protective hardboard/cardboard to be laid on screed
– Electrician to fix wiring for lighting and power circuits
– Wiring taken to external lighting points
– TV aerial/satellite cables to be installed to required positions
– Internal telephone wiring to be installed to required positions
– Home entertainment/smart systems/alarms
9. DRAINAGE/EXTERNAL
– Ground workers to begin digging the trenches for drainage runs
– Trenches backfilled to 150mm with gravel
– Drains laid to required falls
– Brick/concrete manholes or purpose-made manholes, rodding eyes and gullies
– Drains haunched over with gravel
– Drainage trenches backfilled
– Work to connect to main sewer in road to be carried out by approved contractors
– Carpenter to finish boxings and noggings ready for plasterer
– Ground workers to commence driveways and pathways
– Bricklayer to build any fireplaces and hearths
-Plumbers and electricians to liaise on all cross bonding and earthing
10.CEILINGS
– Dryline and tack ceilings boards
– All joints and angles filled and scrim taped
– Plasterers to skim coat all walls and ceilings
– Painting
– All roofing insulation to be installed
11.SECOND FIX CARPENTRY
– Carpenters hang internal doors
– Skirting and architrave to be fitted by carpenters
– Balustrading and handrails to be fitted
– Cupboards and shelving, either by carpenter or cupboard specialist
– Timber floors, if relevant, to be laid by carpenters or specialists (always protect after installation)
– Floor tiles to be laid by specialist tilers and protected
– Carpenters/specialist suppliers to fit/build built-in bedroom and bathroom furniture
– Kitchen units to be fitted
12. SECOND FIX
– All wiring connected
– Geyser to be positioned, plumbed and then wired in
– All sanitaryware to be fitted and plumbed in
– All pipework and connections to be flushed through and pressure tested
13. FINISHES
– Worktops, made from the previously taken templates, to be fitted
– House to be thoroughly cleaned with all debris and dust removed to outside
– Snag any holes, blemishes or rough patches on walls, making good
– Any Internal timber to be sanded smooth or rubbed down with wire wool
– Paint all walls and ceilings with a good quality undercoat plus at least two coats of finishing paint
– Internal timber to be painted, primed, undercoated and top coat glazed,
or internal timber to be two-coat stained
– Specialist tilers to fix wall tiles to kitchen and utility rooms
– Baths to be filled, in order to settle, before tilers fix any wall/splash back tiles (if a fitted bath is selected)
14. LANDSCAPING
– Ground workers or landscape gardeners to level the ground and prepare
– Topsoil from storage to be placed where required, with extra shipped if necessary
– Site office to be removed or could even be kept as a garden shed
– Secure site storage to be returned to hirers
– Ground workers to complete driveway surface
– Patio slabs to be laid
– Bricklayers to build any required decorative walling or boundary walls
– Lawned areas to be leveled ready for seeding or turfed
– Telephone company to connect
– Contractors to install TV aerials and/or satellite dishes
– All trades return for any snags
– Carpets to be laid
15. COMPLETION
– Whole house to be thoroughly cleaned out
– All windows cleaned and all labels removed from glass
– Site toilet and any remaining plant on hire to be off-hired
– Readings to be taken on all meters
– Switch on the geyser
– Local authority to be advised of completion
– All required Certificates to be prepared and sent to building control
– Building control final inspection and issuing of Completion Certificate
– Arrange protective covering for floor surfaces prior to delivery of furniture
– Switch site insurance policy to homeowners’ policy
16 DESIGN AND DECORATING
– Enjoy making your new house a home!